
Sharing Your Studio Server
Server Sharing lets you grant colleagues in your organization access to your running Studio server. Shared users can open notebooks, run workflows, and collaborate in real time — all within your server environment.
Sharing Your Server
Step 1 — Open the Share Dialog
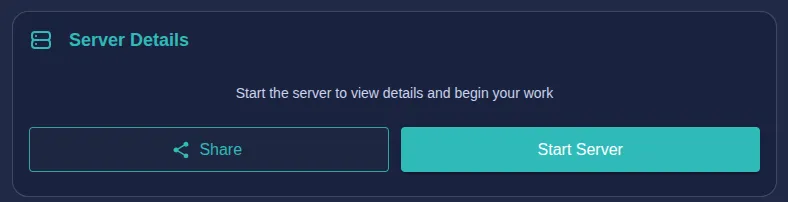
From the Studio home page, locate the Server Details panel. Click the Share button on the left side of the panel.
Step 2 — Add a User
In the Share Server dialog, type the username of the person you want to share with and click Share.
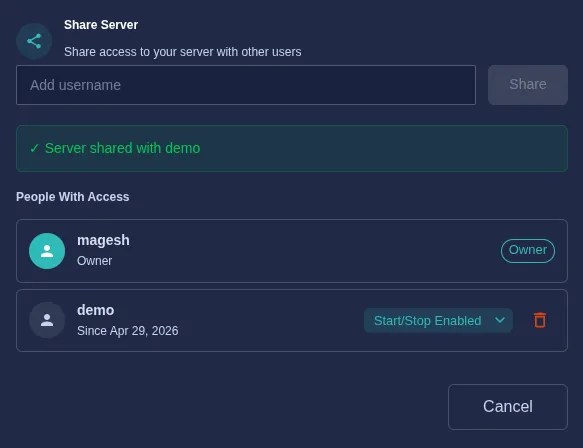
The dialog confirms the share with a success message and the user appears under People With Access.
Step 3 — Set Permissions
For each shared user you can control whether they can start or stop the server:
| Permission | Description |
|---|---|
| Start/Stop Enabled | The user can start and stop the server in addition to accessing it |
| Start/Stop Disabled | The user can access the server but cannot start or stop it |
Use the dropdown next to the user’s name to toggle this permission at any time.
Removing Access
Click the delete icon (trash) next to a user’s entry to revoke their access immediately.
Accessing a Shared Server
When someone shares their server with you, it becomes available alongside your own server. You can switch between servers at any time without logging out.
Switching Servers
In the bottom-left corner of Studio, click the server switcher — it displays the name of your currently active server (e.g., My Server). A dropdown appears listing all servers available to you.
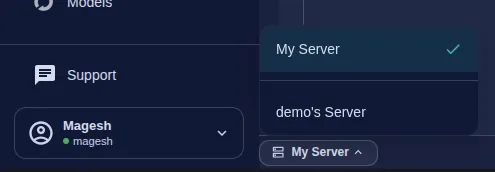
Select any server from the list to switch to it. The active server is indicated with a checkmark. Once switched, all notebooks, files, and tools open within the context of the selected server.
Summary
| Action | Where |
|---|---|
| Share your server | Studio home → Server Details → Share |
| Add a user | Enter username in the Share Server dialog |
| Set start/stop permission | Dropdown next to the user in the dialog |
| Revoke access | Delete icon next to the user in the dialog |
| Switch to a shared server | Bottom-left server switcher dropdown |